
Lemon Macaron Recipe: With Two Delicious Lemon Fillings
Lemon Macarons are perfect for spring and summer, whether you are selling them, gifting them or entertaining. But you’ll want to make sure that they are little flavour bombs filled with delicious fresh zesty lemon flavour.
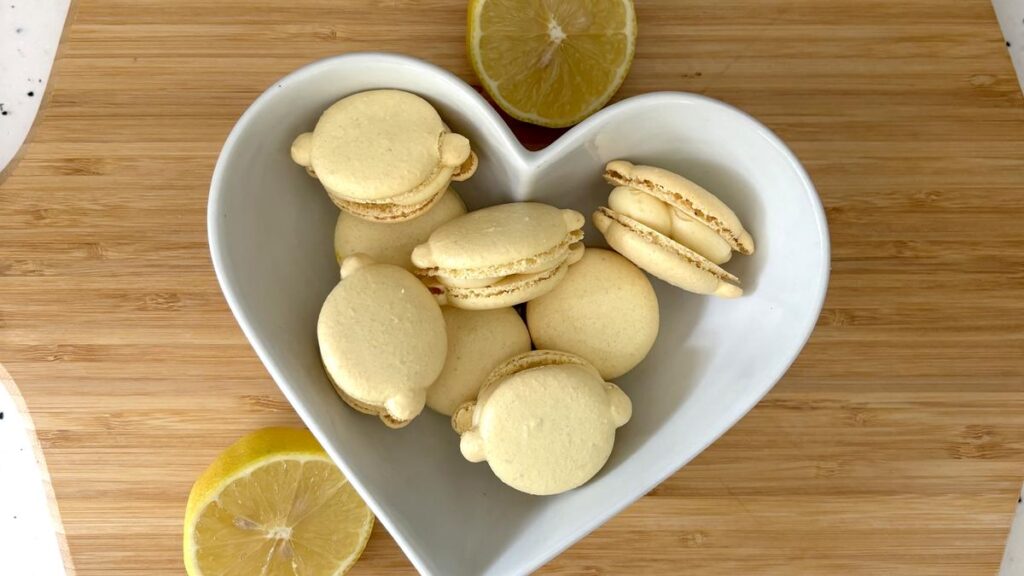
I’ll walk you through how to make homemade lemon macarons that taste as good as they look with two easy lemon fillings to maximise on flavour. And I’ll provide a tutorial on how to make your macarons lemon-shaped using the free template provided (or you can stick to making them round if you prefer)
Master lemon macaron shells, thick lemon curd filling, and whipped white chocolate ganache — all with step-by-step guidance and troubleshooting tips. Whether you’re a confident baker looking for new flavours to add to your menu, or you’re a home baker wanting to wow your family and friends with some summer macarons, this recipe is designed for you.
- Step 1: Prepare Equipment
- Step 2: Prepare Ingredients
- Step 3: Heat and whip the egg whites
- Step 4 – Macronage (combining the wet ingredients with the dry ingredients)
- Step 5 – Pipe out the macarons
- Step 6 – Rest the macarons
- Step 7 – Bake
- Step 1 – Blend the Sugar
- Step 2 – Combine and heat
- Step 3 – Stir until thickened
- Step 4 – Cool and Store the Lemon Curd
- Step 1 – Make White Chocolate Ganache
- Step 2 – Make the Ganache Whipped and Lemony
- Step 1 – Ganache Filling
- Step 2 – Lemon Curd Filling
- Step 3 – Sandwich and Mature
Lemon Macarons are a Summertime Necessity
Lemons scream spring and summer and they also bring a tartness and bitterness that is in contrast with sweet macaron shells making them a perfectly balanced treat. As a practical benefit the filling for these macarons is a thick lemon curd which uses up the discarded egg yolks that are left from making macaron shells. The second filling is a whipped white chocolate ganache which uses some of the lemon curd to give it a lemony flavour.
AT-A-GLANCE INFO: Lemon Macarons
Difficulty Level: Beginner > intermediate (if you’re making them lemon shaped – templates and shaped macarons take a bit more practice)
Yield: ~ 25 Lemon shaped or 30 round macarons
Macaron shell Prep Time: 30 minutes
Resting Time: 20 minutes to 1 hour (you can use this time to work on the fillings)
Bake Time: 2 trays at 20-25 minutes per tray = 1 hour
Filling prep time: 45 minutes
Filling Cooling time: 1 hour
Total Time: 2.5-3 hours
Maturation Time: 24-48 hours
Best For: Selling, Gifting, Entertaining
Key Ingredients: What You’ll Need
Lemons: The juice and zest of lemons are used to make the lemon curd filling exceptionally flavourful. The sugar is first infused with lemon zest in the blender. Then the lemon juice is added and reduced down and intensified during the cooking process. I go into even more detail about why this lemon curd is thick and makes the perfect lemon macaron filling in this recipe post
White Chocolate: Using a good quality white chocolate with at least 27% cocoa solids is really important for a delicious lemon ganache. This is my favourite white chocolate and I have also had success using this one which I buy at my local supermarket (UK readers)
Yellow Gel or powder food colouring: (oil free)- It’s important to use an oil free food colour such as a gel based formula or a powder so that you don’t add oil to the macaron batter and you want to look for a bright yellow. This is the food colouring that I use to get the perfect lemon colour.
Step-by-Step: How to Make Lemon-Shaped Macarons
Step 1: Prepare Equipment
It’s very important to prep your ingredients ahead of time when making macarons because you don’t want to get distracted while you are making the batter and over heat the sugar or over whip the meringue (trust me it happens!)
Prepare baking tray/s with printed lemon template, (if using) underneath a silicone mat or grease proof paper. I use my baking trays upside down for better heat circulation.
Prepare piping bags by inserting the piping nozzles that you will be using. I like to stand my piping bags upright in large drinking glasses to make it easy to pour the batter into them.
Wipe whisk, bowls and silicone mats using a little white vinegar or lemon juice. This removes any traces of fat and grease that may cause your meringue to fail. I wipe off the excess vinegar with a paper kitchen towel.
Put a heatproof bowl on top of a pan with around 2 cm water in it and pop it on the heat with a lid on to bring it to a simmer. Place sugar thermometer near by.
Preheat the oven to 140 degrees C fan oven (285 degrees F) or 160 degrees C non fan oven (320 degrees F). Before you switch the oven on you want to make sure your oven thermometer (s) are in place.
Step 2: Prepare Ingredients
Another boring but necessary step! Sift almond flour into a mixing bowl discarding any large pieces that get stuck in the sieve. Sift the icing sugar into the same bowl.
Weigh egg whites into a heatproof bowl. Add the granulated sugar to the same bowl and whisk then together until combined
Get food colouring and cream of tartar ready beside your mixer.
Step 3: Heat and whip the egg whites
When the pan of water is simmering, turn the heat to medium and place the heatproof bowl containing the egg whites and granulated sugar on top. Stiring very regularly – so that the egg whites don’t start to set on the sides of the bowl – and heat the mixture until it reaches 50 degrees C (120 degrees F). It’s best to use a sugar thermometer to check the temperature. I recently switched to this digital thermometer and its been a game changer
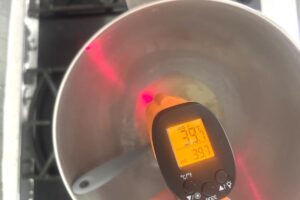
When the egg whites are at 50 degrees, remove bowl from the heat and pop a lid on the pan to avoid adding extra moisture to the room. Move the egg white mixture to the mixer.
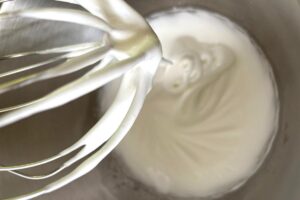
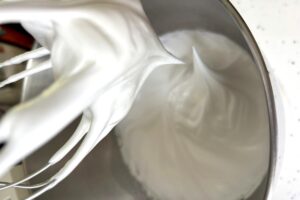
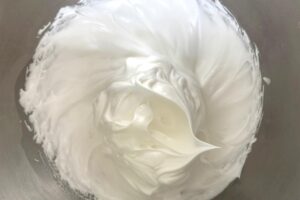
Now it’s time to start whipping up the meringue. What you are aiming for is a strong meringue that is stiff and glossy and you also need to bring the temperature of the mixture down below 28 degrees c. Begin with the mixer on a low speed (3-4 on kitchenaid) and keep to the low speed for 5 minutes . Turn the speed up to medium (6-7 on kitchenaid) and continue to whip and watch the consistency of the meringue change. When you notice that the meringue is starting to come towards the centre and build up around the whisk it’s time to start checking it.
You can test the meringue at any stage by removing the whisk. If the meringue stays in a straight upright peak and the peak doesn’t bend when you wobble the bowl slightly the egg whites are ready. The egg whites on the whisk will also stay on the whisk in a clump when the meringue is ready.
Step 4 – Macronage (combining the wet ingredients with the dry ingredients)
Macronage is a fancy word for gently combining the wet ingredients with the dry ingredients. To do this, add half the almond flour/icing sugar mixture into the meringue. Then with a rubber spatula, slowly and gently combine the mixture. Add in the second half of the almond flour and do the same again. The dry ingredients will gradually stick to and combine with the meringue.
As soon as the mixture is fully combined, add in the food colouring. Continue to fold very lightly and gently as you mix in the colour.
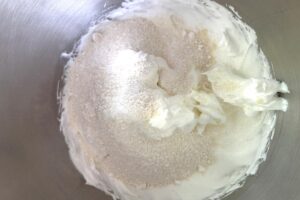
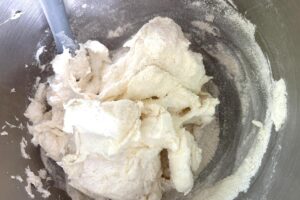
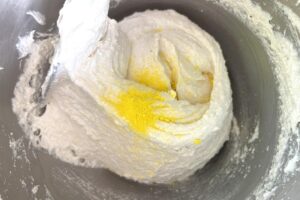
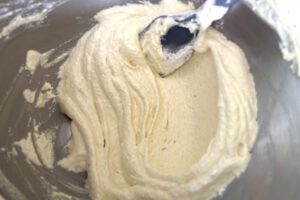
Once the colour is combined continue to fold the batter and begin to press it
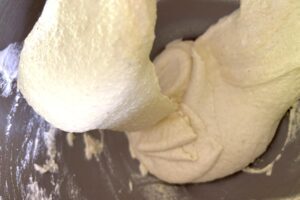
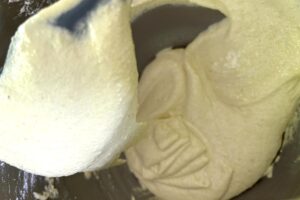
The aim with macronage is to gently remove air and get the mixture to a flowing consistency where the mixture runs off the spatula back into the bowl in a continuous ribbon like stream. You should be able to do at least one figure 8 shape in a continuous flow and the bottom folds should begin to sink back into the mixture and disappear in 10-20 seconds. I start testing the mixture as soon as i’ve added the colour. If the mixture is over mixed the macarons will collapse to it is important to stop as soon as the correct flowing ribbon consistency has been reached.
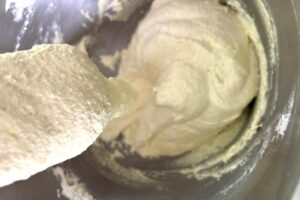
Step 5 – Pipe out the macarons
Finally – the exciting part! Pour the macaron batter into the piping bag(s). 30 grams into the small piping bag and the rest into the large one.
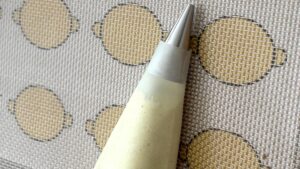
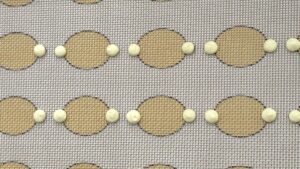
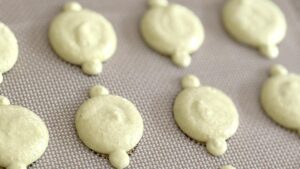
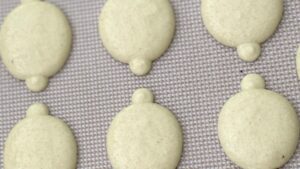
Using the small piping bag, pipe small outer circles using the lemon template as a guide. Then fill in the centre using the larger piping bag/tip. Start piping from the centre, then slowly drag outwards to create a smooth oblong shape.
Step 6 – Rest the macarons
You now want to let the macarons rest until they form a skin. If you brush them lightly with a finger when the skin has formed, no mixture will stick to your finger. It is important to rest the macarons to make sure that they develop ‘feet’ in the oven.
Step 7 – Bake
I can’t stress enough that this is the most important step! Oven thermometers really are the key to understanding your oven. My oven increases in temperature above the set temperature during cooking so I need to keep an eye on the thermometers and adjust the temperature as necessary to keep it at 140 degrees c. Bake the macarons for 9 minutes, turn the tray and then continue to cook for around 9 minutes or until the macarons are stuck solidly to the tray and have firm tops that don’t collapse when tapped.
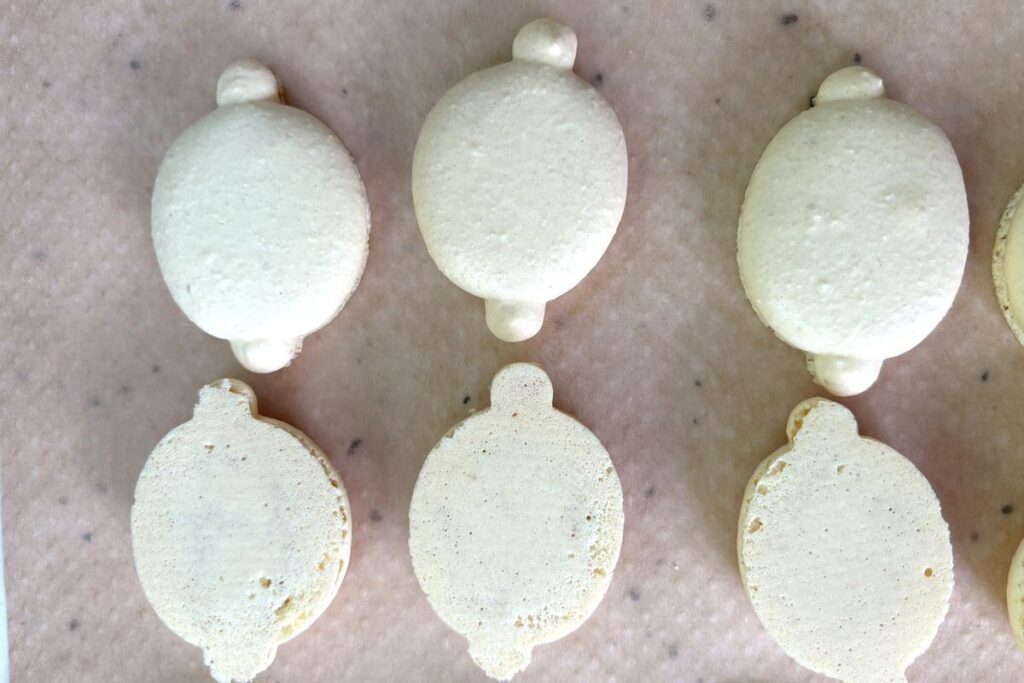
Let the macarons cool on the tray then pair like sized macarons ready for filling.
Step-by-Step: How to Make Lemon Curd Macaron Filling
Step 1 – Blend the Sugar
Start by putting sugar, lemon zest and a pinch of salt into a blender. Blend for around 20 seconds. This step infuses the sugar with oil from the lemon zest and brings out all of the lemon flavour that you need for a delicious lemon curd
Step 2 – Combine and heat
Add the blended sugar mixture along with 70g lemon juice (don’t worry if you have slightly less), egg yolks and unsalted butter to a heatproof bowl. Give it a mix to combine and put the bowl over a saucepan of simmering water on a medium heat. A 3 cm layer of water is enough. Using this gentle heating method for lemon curd rather than directly heating it in a saucepan results in a smooth lemon curd with fewer lumps.
Step 3 – Stir until thickened
Stir continuously using a silicone spatula or heatproof whisk, taking care to scrape the sides of the bowl to stop the mixture from sticking and cooking quickly – which causes lumps.
Step 4 – Cool and Store the Lemon Curd
Pour the curd into a clean heatproof container and leave to cool completely before covering and refrigerating.
Store in a sealed container or jar in the refrigerator for up to two weeks. Lemon curd also freezes very well in ziplock bags or freezable airtight containers. Once frozen, use within a month.
Step-by-Step: How to Make Lemon Ganache Macaron Filling
Step 1 – Make White Chocolate Ganache
Finely chop the white chocolate – the finer the better & put it into a heat proof bowl or jug. Heat up cream in a saucepan or in the microwave in 20 second increments until it begins to simmer.
Pour the hot cream over the white chocolate and mix. Leave for a few seconds then stir again and continue to leave and stir until all of the chocolate has melted.
If the chocolate doesn’t fully melt, you’ll need more heat, so you can use the microwave or pop the ganache in the heatproof container over a pot of boiling water and stir until all the chocolate has melted.
Cover the surface of the ganache with cling film and put it in the fridge to set for around an hour.
Step 2 – Make the Ganache Whipped and Lemony
Once set transfer the ganache into a bigger bowl if needed. Add in 70g of lemon curd and whip using a stand or electric hand mixer. You can add in a couple of drops of room temperature milk if the ganache seems too thick to pipe.
How to fill Macarons Using Ganache and a Curd for minimum sogginess
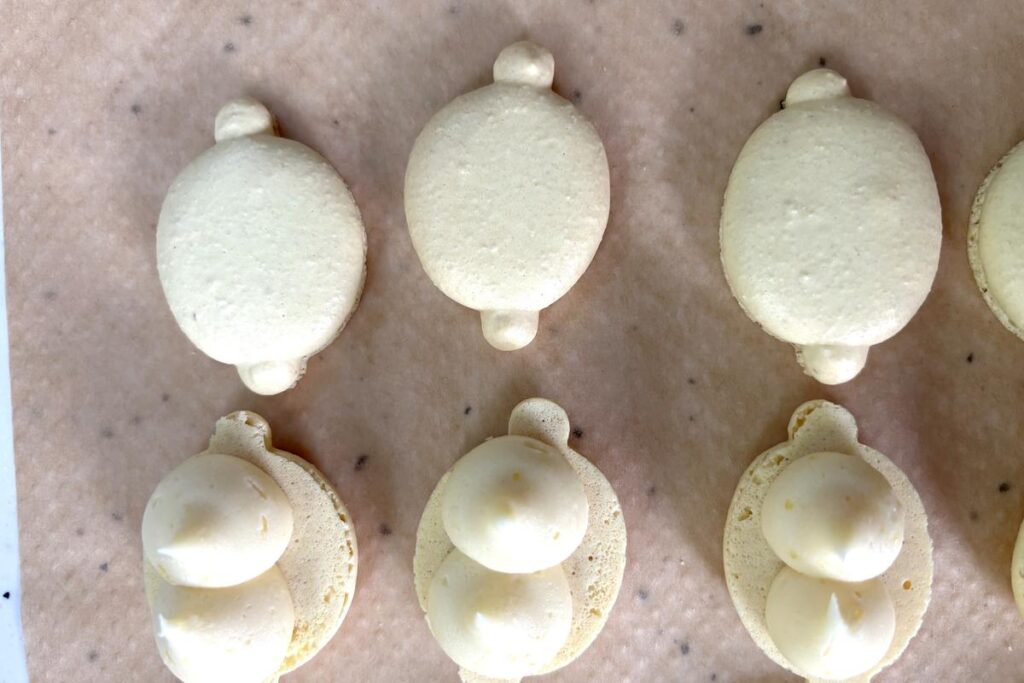
Step 1 – Ganache Filling
Using a piping bag with a large round piping nozzle to add two blobs of lemon ganache macaron filling to one side of each macaron.
Step 2 – Lemon Curd Filling
Then use the smaller bag and tip to inject lemon curd into the ganache until it starts to come out at the top.
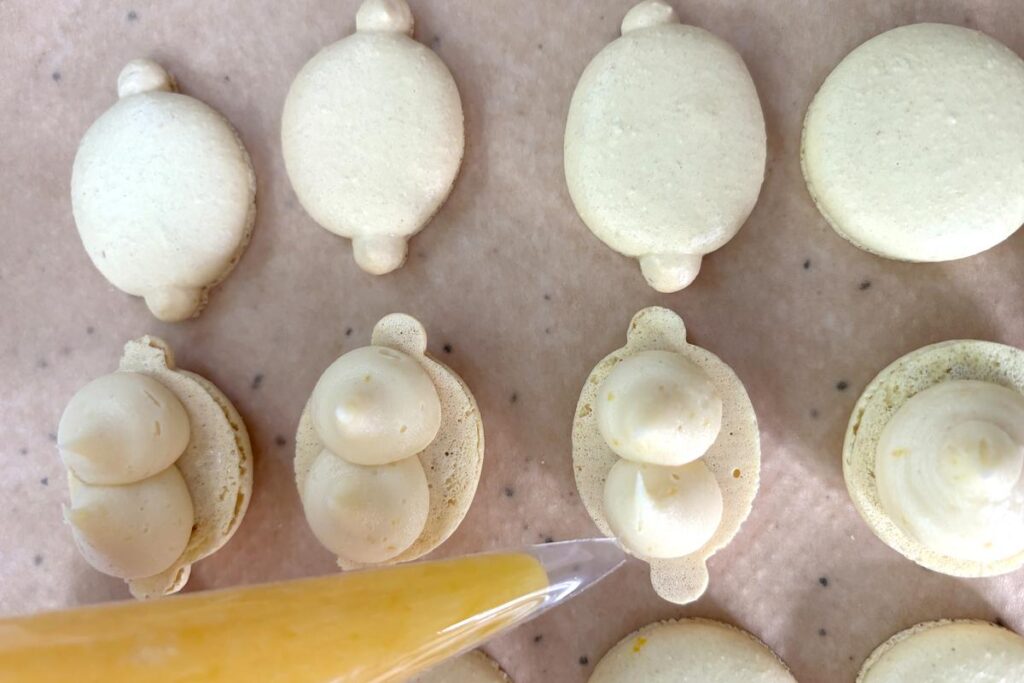
Step 3 – Sandwich and Mature
Top each macaron with its other half. Then pop in an airtight container in the fridge to firm up and mature for 24-48 hours before eating/selling or gifting.
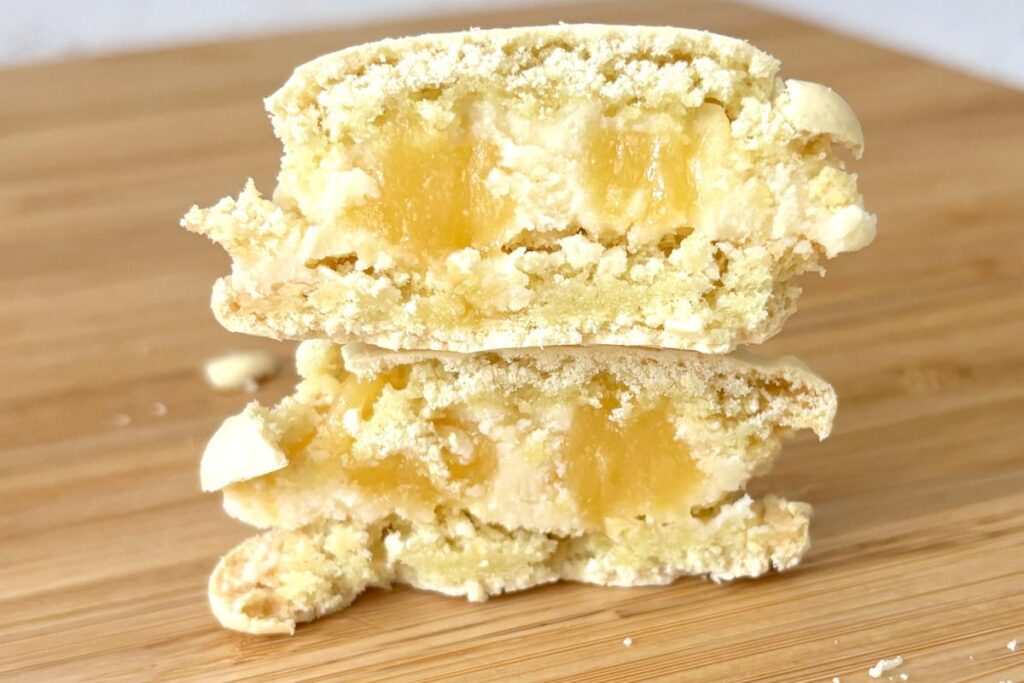

Recipe:

Lemon Macarons
Equipment
- Lemon Zester
- Blender
- Large Saucepan
- Large Heatproof bowl Stand mixer bowl works well
- Heat proof whisk
- Silicone spatula
- Pyrex jug or small heatproof bowl
- Airtight containers To store the lemon curd and the ganache
- Sieve
- Baking trays
- Silicone mat or grease proof paper
- Sugar thermometer
- Oven Thermometer
- Stand mixer or electric hand whisk
- Piping bags and piping nozzles (tips) Wilton 12 and Wilton 5
- Kitchen Scale
Ingredients
Macaron Shell Ingredients
- 110 g Egg White
- 110 g Granulated Sugar
- 110 g Almond flour Sifted weight
- 110 g Icing Sugar Powdered sugar
- 1/4 tsp Cream of Tartar
- Yellow Gel Food Colouring
Lemon Curd Macaron Filling Ingredients
- 2 Lemons 70g Juice and all Zest
- 100 g Sugar
- 50 g Unsalted Butter
- 3 Egg Yolks
- 1 Pinch Salt
Lemon White Chocolate Ganache Ingredients
- 200 g White Chocolate Finely Chopped
- 75 g Double Cream
- 70 g Lemon Curd
- 1 tsp Milk Optional
Instructions
Lemon Macaron Shell Instructions
- Preheat oven to 140 degrees C fan oven (285 degrees F) or 160 degrees C non fan oven (320 degrees F)Prep baking trays with templates and silicone mats/baking paper. Prep piping bags with nozzles. Clean whisks, bowls, mats with white vinegar or lemon juiceFill a pan with around 2 cm water in it and pop it on the heat with a lid on to bring it to a simmer.
- Sift almond flour into a mixing bowl discarding any large pieces that get stuck in the sieve. Sift the icing sugar into the same bowl. Weigh egg whites into a heatproof bowl. Add the granulated sugar to the same bowl and whisk them together until combined
- Heat egg whites and granulated sugar on top of the pan of water to 50 degrees C (120 degrees F) Stir continuously
- Whisk the egg whites using a stand or electric hand mixture. Once they reach soft peaks stage add in the cream of tartar. Continue to whisk the egg white mixture to stiff peaks. Gradually increasing the speed of the whisk for a strong meringue.
- Add dry ingredients half at a time into the meringue and gently fold until combined. Add the food colouring then continue to fold until batter reaches flowing consistency.
- Pour the batter into prepared piping bags. Around 30g in a piping bag with a small piping tip and the remaining batter in a larger piping bag with a medium sized piping tip. Pipe the small round outer sections of the lemon then fill in the centre.
- Rest the macarons until they form a skin
- Bake the macarons for 18-25 minutes, turning the tray half way through cooking time. Ensure the internal oven temperature stays at 140 degrees C.
Lemon Curd Macaron Filling Intructions
- Juice and Zest 2 Lemons
- Add 100g sugar, a pinch of salt and the lemon zest from 2 lemons to a blender and blend for 20 seconds
- Add the blended sugar mixture along with 70g lemon juice, 3 egg yolks and 50g unsalted butter to a heatproof bowl over a saucepan of simmering water
- Stir over the heat until the mixture thickens. Scrape down the sides of the bowl with a silicone spatula every few minutes. When the mixture is very thick and creamy and coats the back of a spoon in a thick layer, it is ready. Ideally you want to heat it to 170-175 degrees F/ 76-79 degrees C.
- Pour the curd into a clean heatproof container and leave to cool completely before covering and refrigerating
Lemon White Chocolate Ganache Instructions
- Finely chop the white chocolate and put it into a glass (pyrex) jug or small heatproof bowl.
- Heat 75g Double cream in a saucepan or in the microwave until it begins to simmer
- Pour the hot cream over the chocolate, mix then leave for 1 minute. After a minute stir the ganache until all of the chocolate has melted.
- Pour into an airtight container. Cover the surface with cling film. Refrigerate until set.
Assemble the Lemon Macarons and Fillings
- Add the lemon curd and lemon white chocolate ganache to piping bags fitted with a large round piping tip (ganache) and small round piping tip (Curd)
- Pair up the macarons and put one side of each macaron pair facing upwards.
- Pipe on a thick layer of ganache
- Inject a small amount of Lemon Curd into the ganache.
- Put the top half onto the macarons
Quantity Note: Using this method, you will need 10-12g ganache and 3-5g lemon curd filling per macaron.
Tips and Tricks
Curds and Jams can make macarons soggy – How to prevent it.
- Using the correct amount of lemon juice – 70g
- Heating the curd up to the correct temperature – 76-79 degrees C (170-175 F) to remove as much moisture as possible and thicken up the curd
- Use a ganache or buttercream along side the curd to stop it from being in direct contact with the macaron shells.
Change out Lemons for Limes
Once you’ve made these Lemon Macarons why not try Lime Macarons. You can use the exact same shell recipe, template and filling recipes – the only difference the juice amount required for the curd.
Key difference: Limes contain less juice than lemons, so you’ll need more limes to reach the 70g juice target for the curd. Typically you’ll need 4–5 limes instead of 2–3 lemons, depending on their size and juiciness.
Colour tip: Use green gel food colouring instead of yellow to create an authentic lime look.
How to serve lemon macarons
Macarons taste best after 10-15 minutes out of the fridge. The filling is more stable when it is still cool, and the shells will be lovely and chewy. Store in the fridge, and pull them out 10-15 minutes before serving.
At room temperature, these macarons stay fresh for 2–3 hours, making them ideal for entertaining, gifting, or transporting. The shells will gradually soften and become less chewy after this time, so plan your serving window accordingly.
Frequently Asked Questions
These macarons should be stored in an airtight container in the fridge and they will stay fresh for up to 5 days to 7 days (including maturation time 24-48 hours)
Yes and it makes sense to do so if you can. Make the lemon curd macaron filling and the white chocolate ganache base up to 3 days ahead and store in airtight containers in the fridge. Bring the lemon curd and ganache base up to room temperature an hour or two before you need them Then whip the lemon curd in with the ganache when you are ready to fill.
You can print two template sheets and cut and stick them together to make them fit to your trays. I also provide a blank and white version of the template in case you don’t want to use colour ink. Link to the template is further down this page.
Macaron small circles (ends of the lemon shape) – Small round tip – Wilton 5
Macaron larger area – Medium Round – Wilton 2A
Ganache – Medium to large round – Wilton 2A (large) or Wilton 12 (medium
Curd – Very small round – Wilton 2 or you can just use a disposable bag and snip off the very end
FLAVOUR VARIATIONS
Lemon Meringue Pie – Sprinkle on some crunchy crumble to make a pie like taste and texture
Lime Macarons – Make a lime curd – You can use the same shell recipe, template and filling recipes – just remember limes contain less juice than lemons so you will need more to get 70g of lime juice.
Buttercream – Use buttercream rather than ganache – buttercream is more budget friendly and equally delicious. I suggest using this macaron buttercream recipe and adding in 50-70g lemon curd before adding in any cream so that you get the texture just right.
Design Variations
Add a leaf – Use royal icing to add a leaf – my small batch royal icing recipe would be perfect to use for that.
Mix up the colours – Make some green and some yellow to make a fruit bowl of lemons and limes.
Dip them – For a delicious looking macaron dip half of the filled macaron in melted white chocolate