
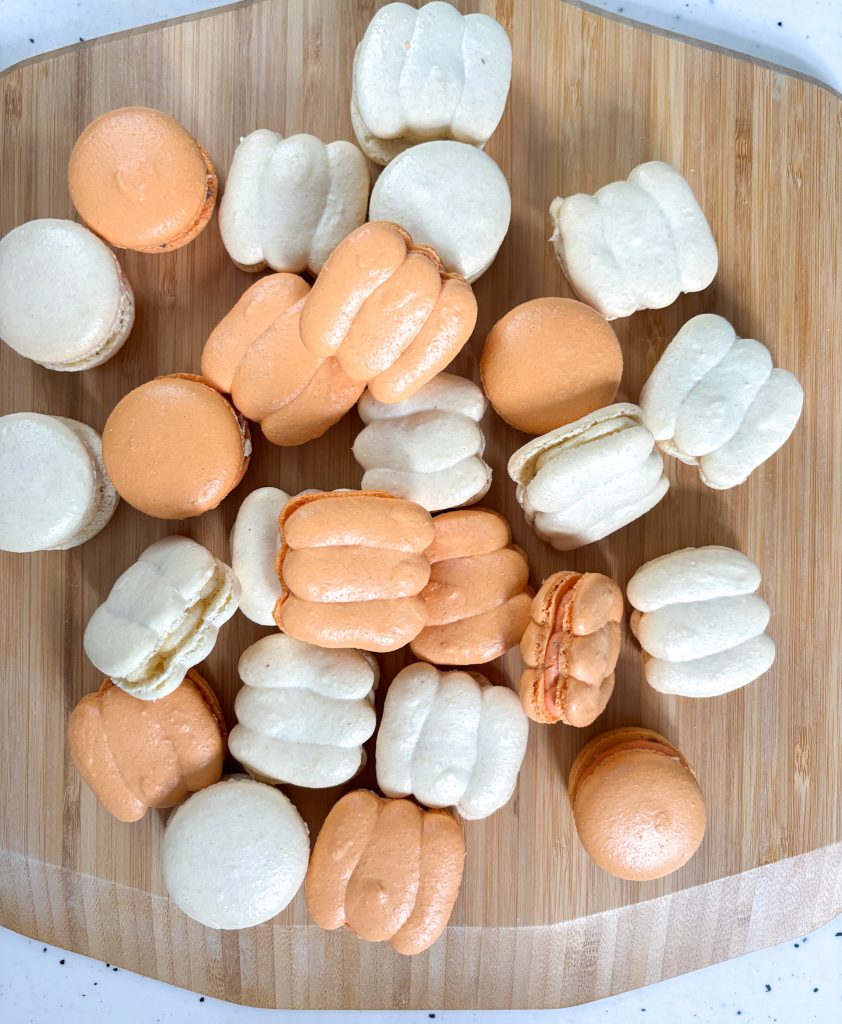
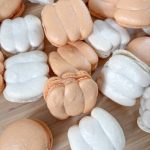
These pumpkin-shaped Macarons are the perfect Autumn treat. Here you’ll find easy-to-follow, tested, step- by-step instructions with photos – and I’m also sharing my printable macaron template! I can’t wait to hear how you get on with making these little Fall Macarons!

Fall Macaron Fillings
The batch of Pumpkin Macarons pictured are filled with a pumpkin spiced butter cream -to stick with the Autumn Pumpkin theme! I opted to make the buttercream the same colour as the macaron shells for a uniformed aesthetic. If you’re not keen on pumpkin spice, a thick chewy caramel or white-chocolate ganache would be equally delicious. To turn these into Halloween macarons you could colour them bright green or orange and fill them with buttercream and lime curd or lemon curd!
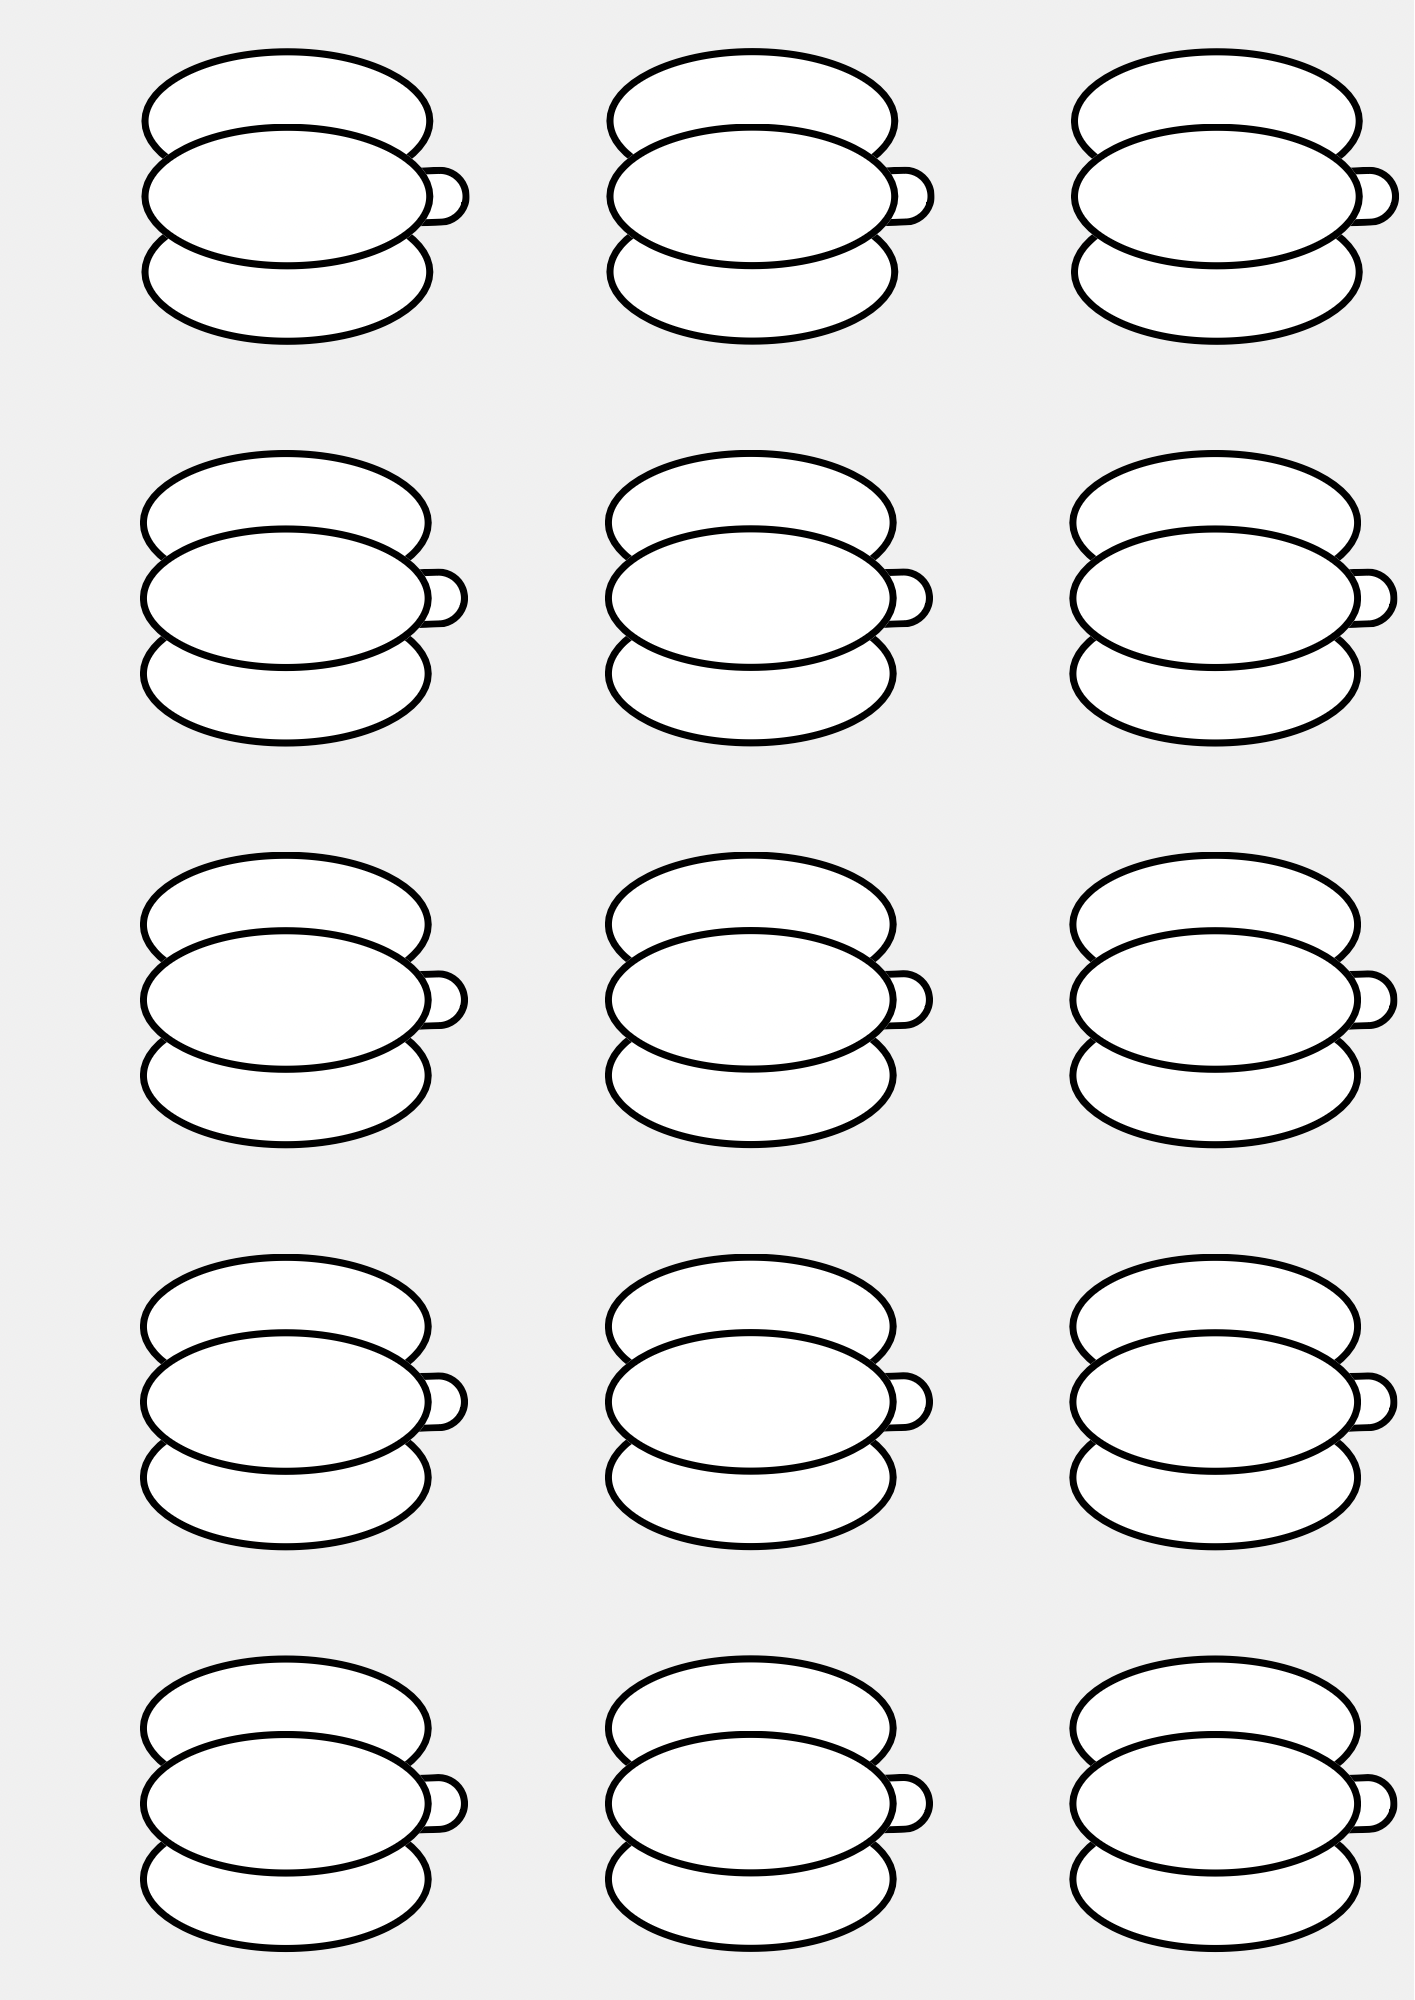
Using the Pumpkin Macaron Template
As far as shaped macarons go these ones are pretty easy – just 3 straight(ish) lines – and good to try if you are just starting to experiment with shapes and templates!
The instructions below are very detailed and if you have made macarons before you might not need to read all the steps but making macarons by following all of the steps below, starting by taking the time to prep my equipment and ingredients really helps me to work efficiently!
Step-by-Step Instructions
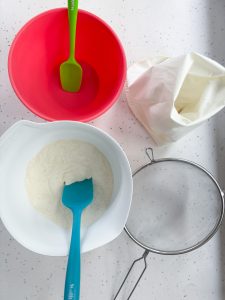
Step 1 – Prepare Equipment
Prepare baking tray/s with printed pumpkin template underneath a silicone mat or grease proof paper. I use my baking trays upside down for better heat circulation.
Prepare piping bags by inserting the piping nozzles that you will be using. I like to stand my piping bags upright in pint glasses to make it easy to pour the batter into them.
Clean whisks, bowls and silicone mats using a little white vinegar or lemon juice. This removes any traces of fat and grease that may cause your meringue to fail. I wipe off the excess vinegar with a paper kitchen towel.
Put a heatproof bowl on top of a pan with around 2 cm water in it and pop it on the heat with a lid on to bring it to a simmer.
Preheat the oven to 140 degrees C fan oven (285 degrees F) or 160 degrees C non fan oven (320 degrees F)
Step 2 – Prepare Ingredients
Sift almond flour into a mixing bowl discarding any large pieces that get stuck in the sieve. Sift the icing sugar into the same bowl.
Weigh egg whites into a heatproof bowl. Add the granulated sugar to the same bowl and whisk then together until combined
Have any food colouring that you will be using to hand. I mixed together orange and red food colouring to make the orange pumpkins and I didn’t add any food colouring when making the white pumpkins
Step 3 – Heat and whip the egg whites
When the pan of water is simmering, turn the heat to medium and place the heatproof bowl containing the egg whites and granulated sugar on top. Stiring very regularly – so that the egg whites don’t start to set on the sides of the bowl – and heat the mixture until it reaches 50 degrees C (120 degrees F). It’s best to use a sugar thermometer to check the temperature.
When the egg whites are at the correct temperature, remove bowl from the heat and pop a lid on the pan to avoid adding extra moisture to the room.
Now it’s time to start whipping up the meringue. What you are aiming for is a strong meringue that is stiff and glossy – but not too stiff. To achieve this start with the mixer on a low speed (2-3 on kitchenaid) and keep to the low speed for around 2 minutes when the egg whites should be covered in foam like bubbles. Turn the speed up to medium (6-7 on kitchenaid) and whip for another minute or two. The remaining whipping time can be done at high speed (8-10 on kitchenaid)
You can test the meringue at any stage by removing the whisk. If the meringue stays in a straight upright peak and the peak doesn’t bend when you wobble the bowl slightly the egg whites are ready. The egg whites on the whisk will also stay on the whisk in a clump when the meringue is ready.
Step 4 – Macronage (combining the wet ingredients with the dry ingredients)
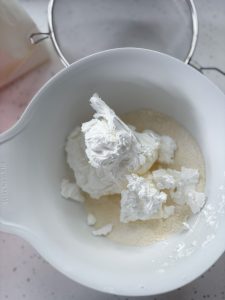
Macronage is a fancy word for gently combining the wet ingredients with the dry ingredients. To do this, add all the meringue mixture into the bowl with the almond flour and icing sugar. Then with a rubber spatula, slowly and gently combine the mixture. The dry ingredients will gradually stick to and combine with the meringue.
As soon as the mixture is fully combined, add in the food colouring. If you are using two colours, divide the mixture into two bowls at this stage. Continue to fold very lightly and gently as you mix in the colour.
The aim with macron age is to get the mixture to a flowing consistency where the mixture flows off the spatula back into the bowl in a continuous ribbon like stream. You should be able to do at least one figure 8 shape in a continuous flow. I start testing the mixture as soon as i’ve added the colour. If the mixture is over mixed the macarons will collapse to it is important to stop as soon as the flowing ribbon consistency has been reached.
Step 5 – Piping
Finally – the exciting part! Pour the macaron batter into the piping bag(s). To make sure that you achieve a pumpkin shape with distinct sections you, first need to pipe the two outer sections. Do this by piping a line of batter out, releasing the pressure on the piping bag just before the line needs to end so that you don’t pipe out too much batter.
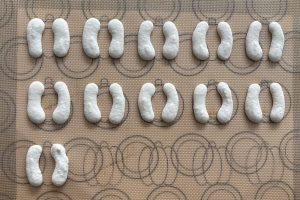
When you have piped the two outer sections of each pumpkin bang the tray against the worktop a few times to remove any air bubbles then pop the tray into the preheated oven for 20 seconds, this will dry the macarons enough to be able to pipe the centres straight away. If your oven is not pre heated leave the tray to sit for 10 minutes before continuing.
Now pipe the middle sections. Bang the tray against the worktop again to remove bubbles from the middle section.
Step 6 – Rest the macarons
You now want to let the macarons rest until they form a skin. If you brush them lightly with a finger when the skin has formed, no mixture will stick to your finger. It is important to rest the macarons to make sure that they develop ‘feet’ in the oven.
Step 7 – Bake
I can’t stress enough that this is the most important step! Oven thermometers really are the key to understanding your oven. My oven increases in temperature above the set temperature during cooking so I need to keep an eye on the thermometers and adjust the temperature as necessary. As a rule of thumb you want to bake the macarons for 9 minutes, turn the tray and then continue to cook for around 9 minutes or until the macarons are stuck solidly to the tray and have firm tops that don’t collapse when tapped.
Let the macarons cool on the tray then pair like sized macarons ready for filling.
Step 8 – Fill the Macarons
Using a piping bag with a round piping nozzle add a blob of filling to one side of each macaron and top with the other half.
Printable Recipe
Pumpkin Shaped Macarons
Equipment
- Kitchen Scale
- Heatproof bowl A metal or glass stand mixer bowl would be ideal
- Whisk
- Saucepan
- Sugar thermometer
- Stand or hand mixer
- Sieve
- Large mixing bowl
- Silicone spatula
- Piping bag/s One for each colour
- Piping Nozzle I use Wilton 12
- Baking Tray/s
- Silicone Mat or Baking Paper
- Oven thermometers
Ingredients
- 85 g Icing Sugar
- 95 g Almond Flour (Ground Almonds)
- 80 g Egg Whites You will need 2-3 eggs
- 75 g Granulated Sugar
- Gel food colouring Orange or red and yellow to mix orange
- White Vinegar Or Lemon Juice to clean equipment
Instructions
Prep equipment
- Preheat oven to 140 degrees C fan oven (285 degrees F) or 160 degrees C non fan oven (320 degrees F)Prep baking trays with templates and silicone mats/baking paper. Prep piping bags with nozzles. Clean whisks, bowls, mats with white vinegar or lemon juiceFill a pan with around 2 cm water in it and pop it on the heat with a lid on to bring it to a simmer.
Prep ingredients
- Sift almond flour into a mixing bowl discarding any large pieces that get stuck in the sieve. Sift the icing sugar into the same bowl. Weigh egg whites into a heatproof bowl. Add the granulated sugar to the same bowl and whisk them together until combined
Make the Swiss Meringue
- Heat egg whites and granulated sugar on top of the pan of water to 50 degrees C (120 degrees F) Stir continuously
- Whisk the egg whites using a stand or hand mixture. Once they reach soft peaks stage add in the cream of tartar. Continue to whisk the egg white mixture to stiff peaks. Gradually increasing the speed of the whisk for a strong meringue.
Macronage
- Add the meringue into the dry ingredients bowl and gently fold until combined. Continue to fold until batter reaches flowing consistency.
Pipe, Rest and Bake
- Pour the batter into prepared piping bag and pipe out the two outer sections of the pumpkin shape. Tap the trays on the worktop to remove air bubbles. Use a cocktail stick to smooth over any holes left by bubbles popping.
- Put the tray in the preheated oven for 20 seconds
- Pipe out the centre sections of the pumpkins. Tap the tray again.
- Rest the macarons until they form a skin
- Bake the macarons for 18-20 minutes, turning the tray half way through cooking time.
Fill macarons
- Make filling according to recipe and pipe a small amount onto a macaron shell then top with a like sized macaron shell
Frequently asked questions…
You can but they probably won’t turn out exactly the same and using a template makes it much easier. I would highly recommend using a template.
As long as the filling contains no gluten, macarons made using this recipe are gluten free
Wilton 12 round nozzle